How to Backup eM Client Emails | Instant Batch Backup


Let’s figure out how we can backup eM client emails locally. eM Client is an email client designed to manage emails, contacts, calendars, tasks, etc. like any other email provider. It is available for both Mac & Windows. We can’t solely depend on the email application without any proper backup, as any issues could lead to data loss and other issues related to data management.
The guide will walk you through different approaches to effectively save emails from the eM Client. As per the requirement, the user can choose the method.
Understanding the Importance of eM Backup
First, we will find out why it is important to backup emails from any email client.
- Data Loss Prevention: If the system crashes, hard drive failure or any accidental deletion can result in permanent data loss. Backing up emails can safeguard the data so that the user can recover the emails in the event of such a mishap.
- Migration: The backup of the eM Client allows for easy migration of emails from one place to another. Even if the requirement is to move to another computer. This allows a fast restoration in case of accidental data loss or corruption.
- Legal Requirements: Some industries have laws to mandate the organization to keep email records for legal reasons. Backup helps you to comply with the requirements.
Save Emails from eM Client Manually
Like any other email client, eM Client also has the option to copy its emails to the desktop.
- Sign in to the eM Client.
- Navigate to the Menu and choose the Backup.
- Click on the Apply button after setting up all the details.
Soon the client will start downloading the emails from the account locally to the destination location provided by the user.
How to Backup eM Emails in Bulk?
The best approach is the use the Email Backup tool. It has the option of IMAP, which can be used to extract emails from eM Client. Use the toolkit to save all the emails from the eM Client with ease. Get different saving options to store the emails within the system. Without the need of any additional support, extract the emails.
4 Steps to Get Emails from eM Client
- Launch the software and select IMAP from Email Source.
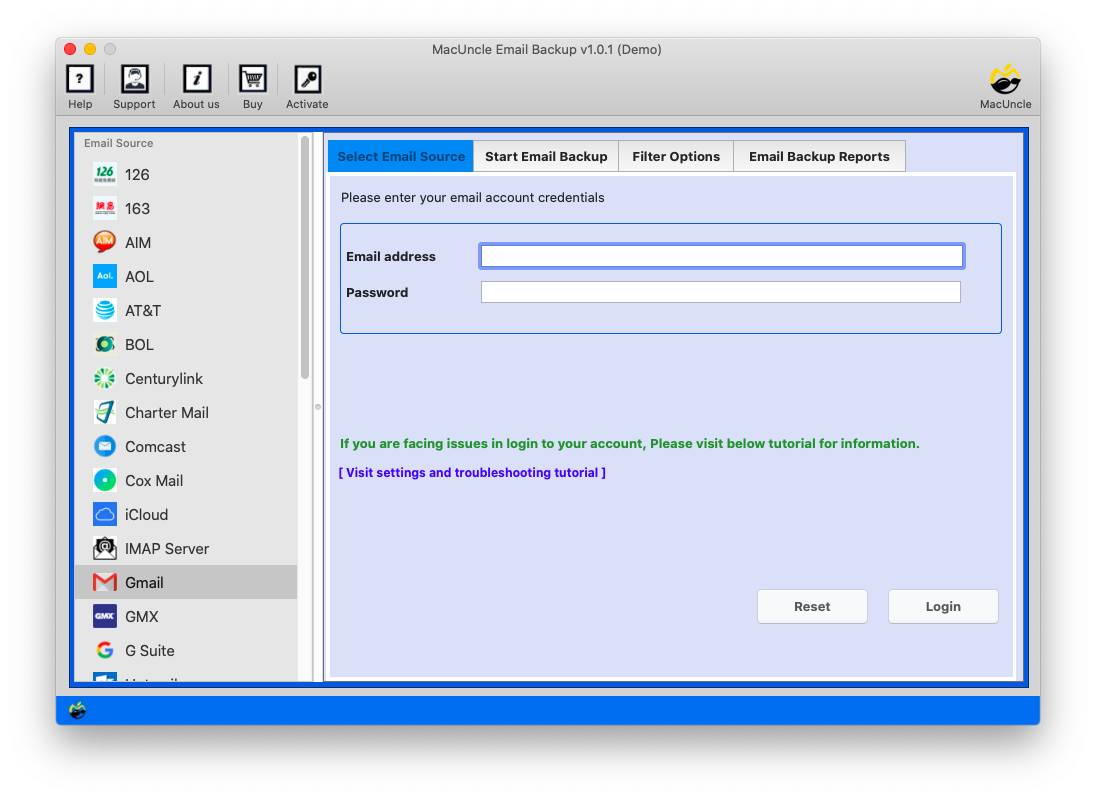
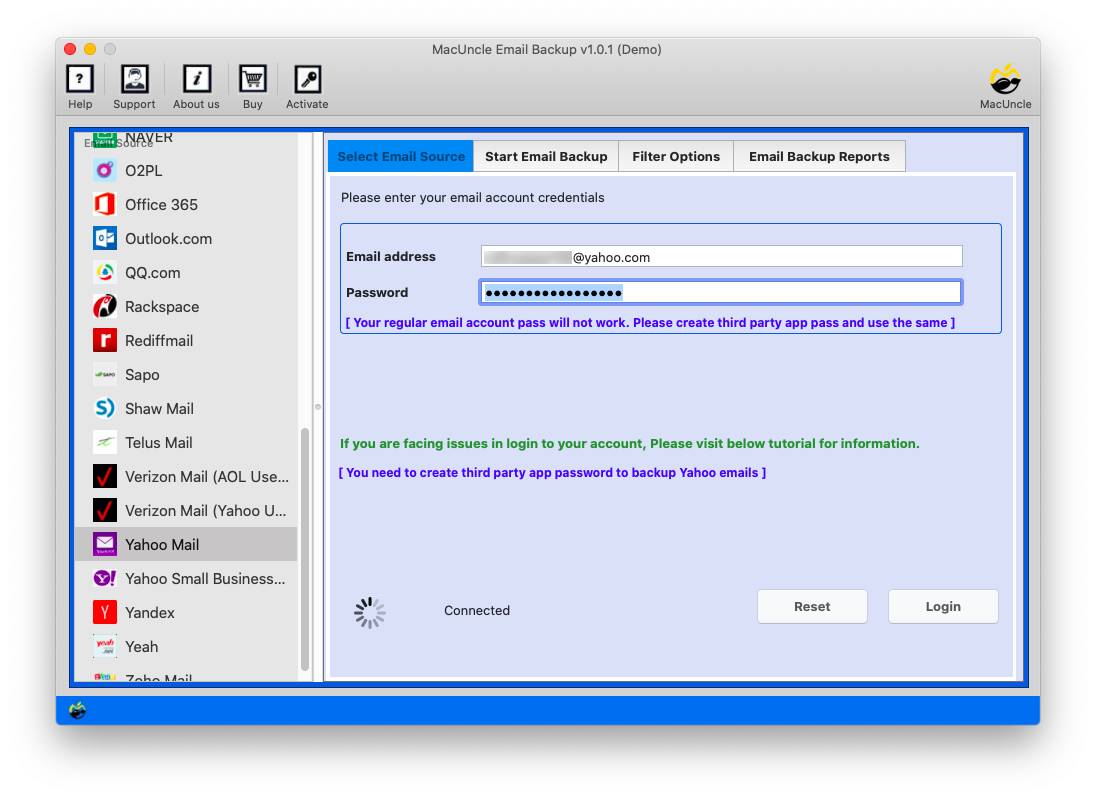
- Enter the eM Client email ID and password. Fill in other IMAP details.
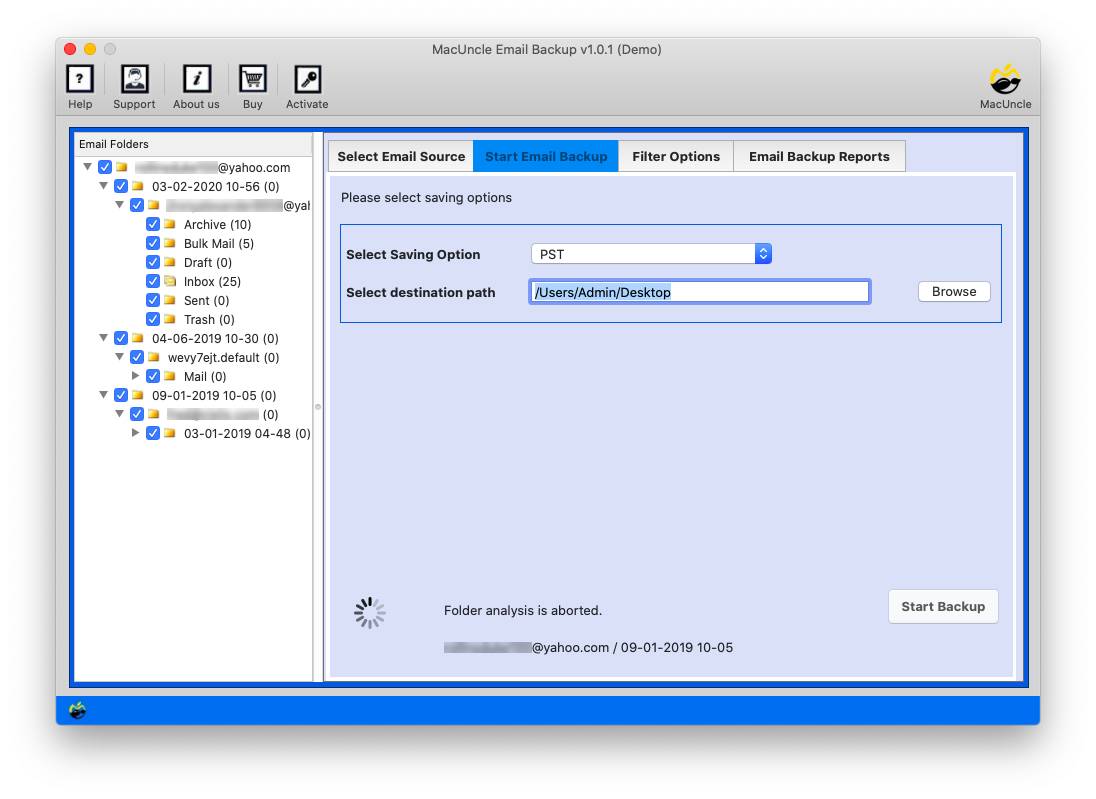
- Choose the desired folders and Select a file format or an email client from the options mentioned.
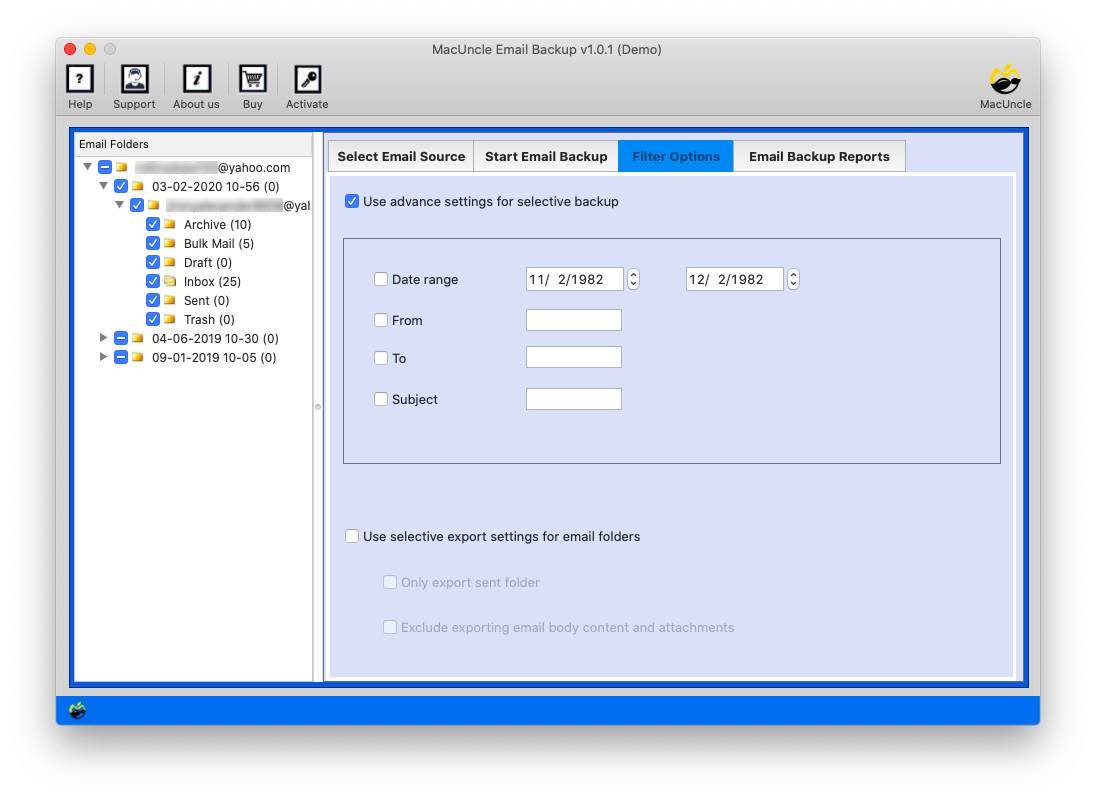
- Go to the filter option to selectively save eM Client emails.
- Tab on Start Backup to initiate the procedure.
Benefits of Using the Automated Tool
Backup eM Client emails with the recommended software as it gives an instant result. Here are some of the benefits you can avail with the toolkit.
- Batch Backup: Without repeating any steps, use the software to perform a batch backup of the eM Client. Save all the emails from the account. Users can select the entire folder for a quick export method.
- Filter and Backup: The advanced filter option allows users to perform the selective backup of emails and other data.
- Multiple Saving Options: Backup eM Client emails to different saving options. Save the emails to another file format or import eM Client to Outlook or another email provider.
- Instant Solution: Within a few steps get the result with complete accuracy. Save time by performing tasks faster than the manual processes.
- Enhanced Data Security: The tool keeps the data secure even after performing batch backups of emails.
Conclusion
In the article, you will get the best approach to back up eM Client emails. First, try it out with the manual method and the automated approach. Backup eM Client is a simple yet essential task that can save you from the frustration and inconvenience of any data loss. By following the steps outlined in this guide and adopting the best practices, you can safeguard the data.