How to Add iCloud to Thunderbird Account ?
Synopsis: While the majority of consumers use cloud computing to manage and exchange their data, some users prefer system-based email clients. Many iCloud customers would want to convert to Thunderbird but are unable to do so owing to a lack of understanding on how to do so. As a result, if you are one of the people who are unsure how to add iCloud email to Thunderbird, we recommend reading this full post.
Even though users have the option to switch to any email client from iCloud, they typically choose Thunderbird. The reason for iCloud mail in Thunderbird is straightforward: Thunderbird has several special benefits that no other email client can match. To better understand Thunderbird, we advise you to read some of its benefits.
Table of Contents
- Benefits of Adding iCloud Mail in Thunderbird
- A DIY method for setting up iCloud to Thunderbird
- Things to consider while using DIY method
- A Quick method for adding iCloud Mail in Thunderbird
- Detailed instructions for exporting iCloud to Thunderbird
- Why should choose quick method over manual?
- Conclusion
The Benefits of Moving iCloud Data to Thunderbird
- Unified Inbox: Connected to an email account or by moving emails from one account to another would reduce the need to switch between multiple email clients.
- Offline Access: Thunderbird stores the emails in the default location which user can access the emails offline. Thus, users can work on the emails without any internet connection.
- Advanced Features: With the robust customization option to personalize the client to the specific need. Also, provides powerful functionalities such as Filters, smart folders, and other advanced search capabilities to enhance email management.
There are essentially two ways to configure iCloud on Thunderbird. The first is manually adding the account, while the second is a quick and easy method to move data from iCloud Mail to Thunderbird. Examine both strategies to see which one is best for you.
How to Add iCloud to Thunderbird? A DIY Method
Three simple actions must be followed to add iCloud Mail in Thunderbird:
- Enable two-factor verification.
- Create an app-specific password in iCloud.
- Configure your iCloud account in Thunderbird.
To effectively configure iCloud on Thunderbird, start by looking over all the steps listed below.
Enable Two-factor Verification
You must first confirm that two-factor security is activated in your Apple account:
While using an iOS device, take the following actions:
- Access Settings.
- Navigate to Security & Password.
- Make two-factor authentication available.
Do the following steps on your Apple Mac device:
- Activate System Preferences.
- Pick iCloud.
- Decide on Account Information.
- Go to Security.
- Create two-factor authentication available.
In iCloud, create an app-specific passcode.
Create an app-specific password once you’ve enabled two-factor verification.
- Sign in to your Apple account.
- The code you obtained via your Apple device should be copied and pasted.
- Press on App-Specific Passwords under Sign-In and Security to access them.
- Choose Create an app-specific password from the menu.
- After entering Thunderbird, hit Create.
- Your iCloud password must be verified.
- The created password should be copied and stored securely.
- It is required in Thunderbird. You have to start over if you misplace it.
It’s time to head to Thunderbird right now.
Add iCloud Email to Thunderbird
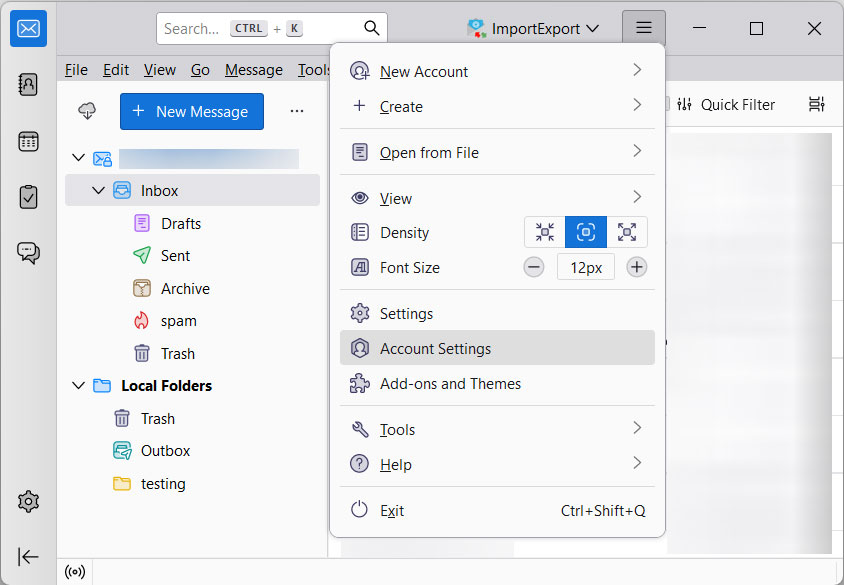
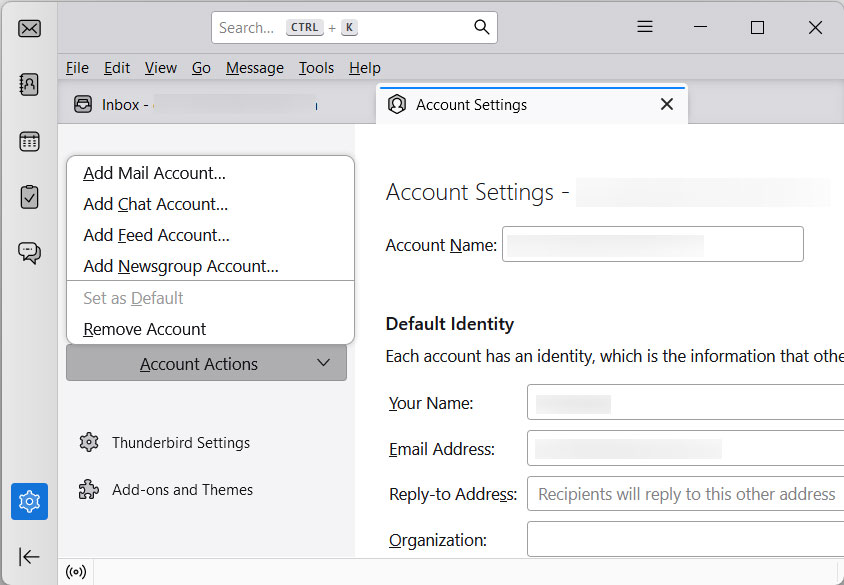
- Start the Thunderbird application then go to Tool> Account Settings>Account Actions.
- Choose to Add Mail Account under Account Actions.
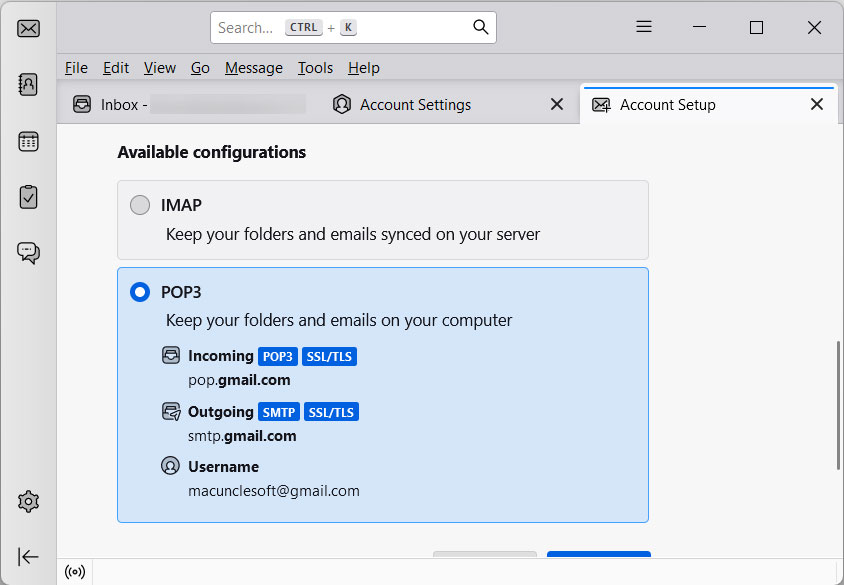
- Type in your full name, iCloud email address, and the app-specific passcode that was established.
- Choose Continue >> Choose Done >> Choose Finish.
So there you have it—a DIY method for adding iCloud Mail to Thunderbird. So, as you can see from the whole set of operations above, the procedure is quite lengthy. Before employing the manual way, there are a few considerations that we’ve mentioned.
Points to Consider While Using Manual Approaches
- The manual approach of adding iCloud to Thunderbird is time-consuming.
- You will not be able to add the particular iCloud folders to Thunderbird.
- The processes could get quite dependent on Thunderbird versions.
- Users must have technical knowledge to complete the process.
To address all of the limitations of the DIY technique, we have also provided an all-in-one and simple-to-use solution, which you can see below.
A Quick Method Migrate iCloud Emails to Thunderbird
The MacUncle Email Backup Wizard is one of the finest methods to transfer iCloud emails to Thunderbird email. This app will help import important emails from an iCloud account to a Thunderbird account. Aside from email and files, the app may import iCloud to Thunderbird. The application is the better option if connecting iCloud to Thunderbird is not possible
It is safe, simple to use, and effective. It only takes a few steps to download the iCloud email to Thunderbird. To understand the tool’s work, go through the complete step-by-step method outlined below.
How to Add iCloud Emails to Thunderbird Account Directly?
- Before you add iCloud email to Thunderbird, you must download, install, and execute the iCloud to Thunderbird conversion software on your Mac.
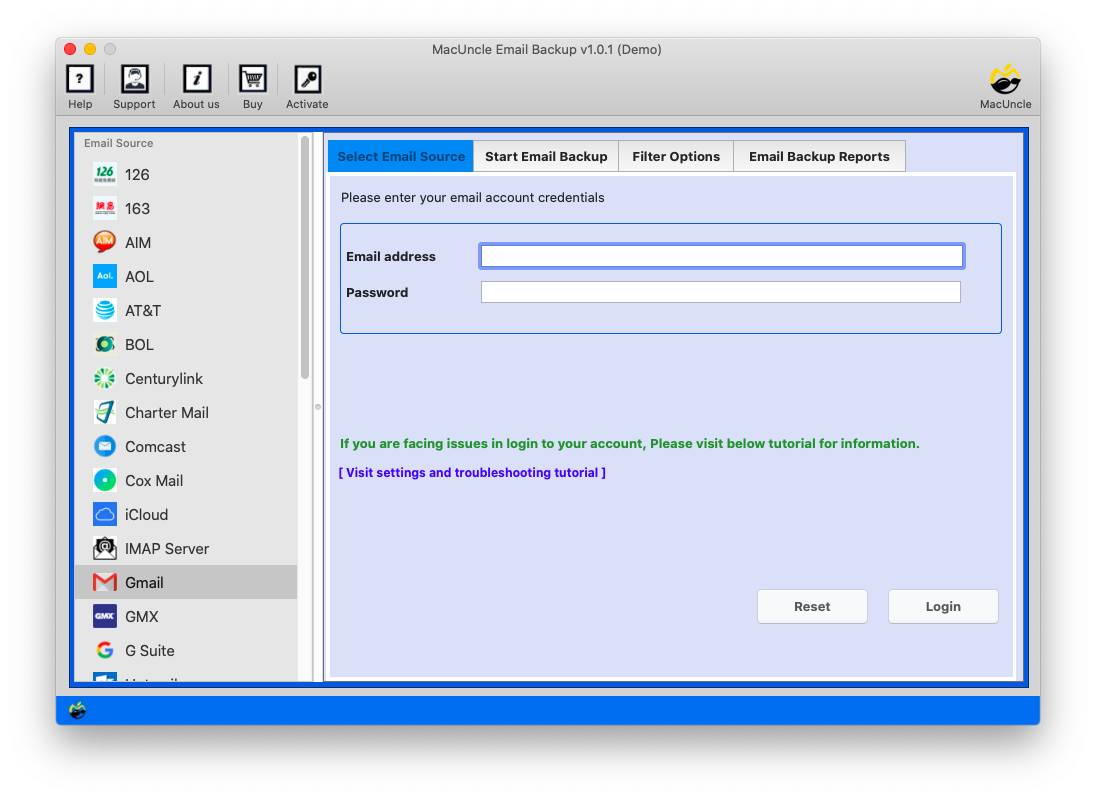
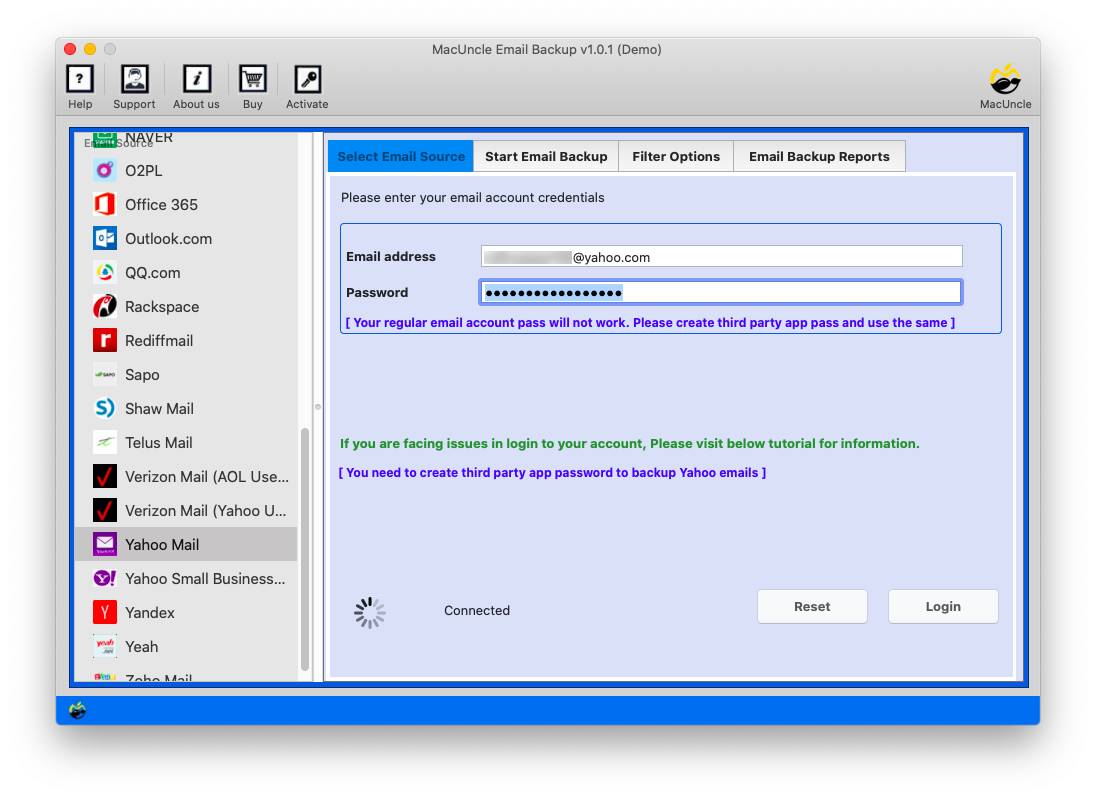
- The tool won’t sync with your iCloud account until you provide your password and iCloud email address. As a result, to add iCloud mail in Thunderbird, provide account credentials.
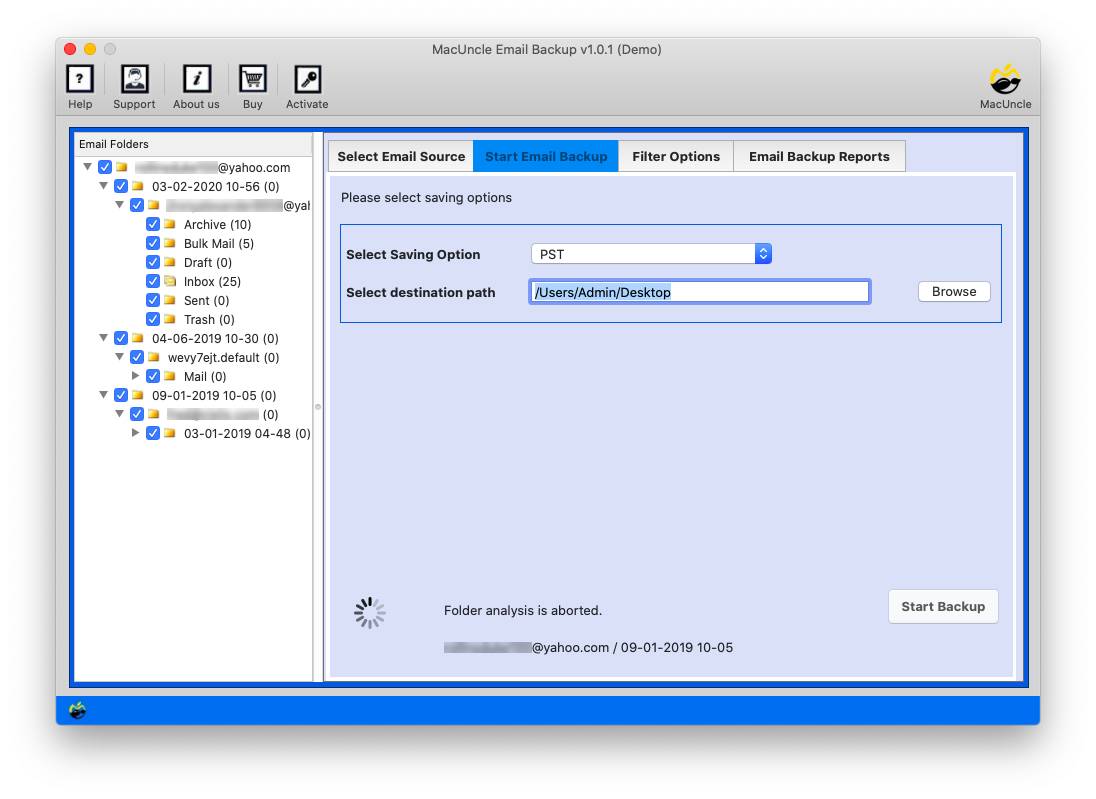
- You must choose each iCloud folder for migration after importing them all into the application, and then choose MBOX as the saving format.
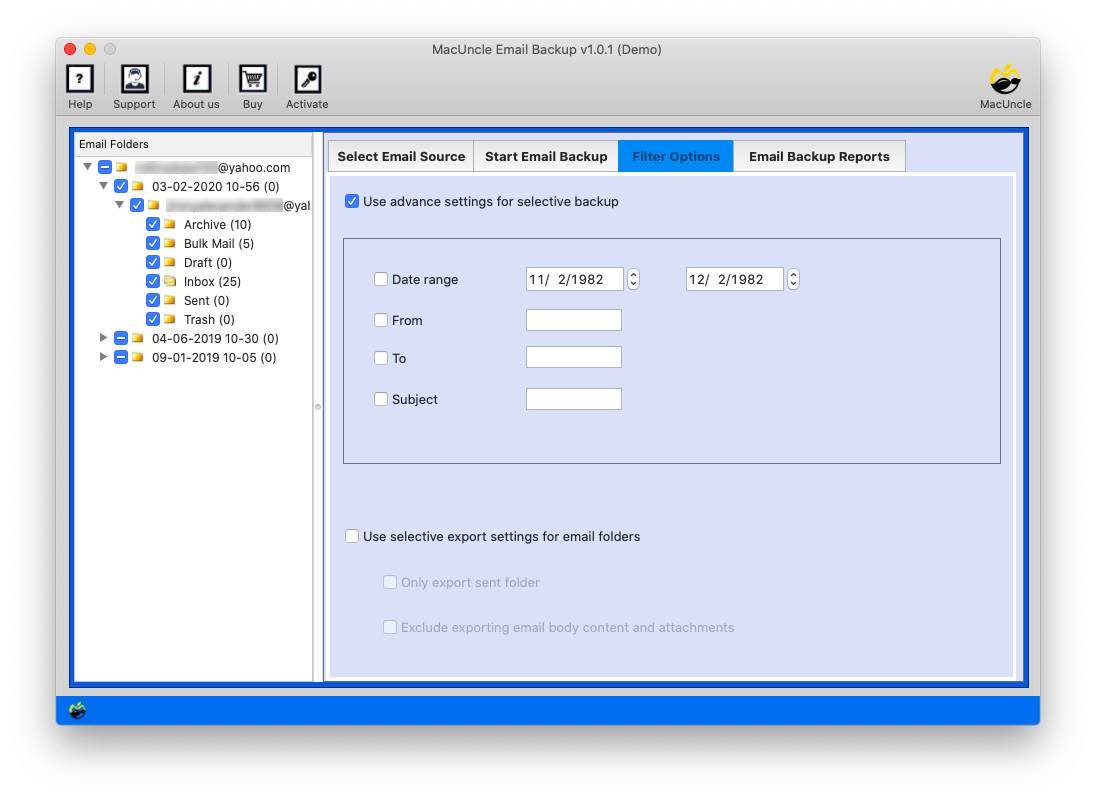
- To accomplish selective migration, a variety of filters, such as migration from a certain period, can be employed. Select the “Start Email Backup” option to add iCloud email to Thunderbird.
Now that you know how to use the software to add iCloud to Thunderbird email, you should understand why you should use it. To better understand the application, we have explained several of its features. So go through them one by the time.
Use the same application to:
Learn More About Software to Migrate iCloud Mail in Thunderbird
- Simple to Use: The software to download emails from iCloud to Thunderbird is quite easy to use. It is created with the most basic graphical user interface so that even non-technical users may utilize it.
- Add iCloud Email to Thunderbird in Bulk: Use this tool when you have a limitless amount of data to transmit. With the tool, you may import a large number of iCloud folders to your Thunderbird account at the same time without encountering any problems.
- Transfer General Data: The application to transfer iCloud to Thunderbird can move all general data related to your iCloud account. iCloud email, attachments, and other items may all be transferred at once.
- Compatibility with Operating Systems: The utility is fully functional on Mac devices. On Mac OS 10.8 Mountain Lion and later versions, you may download iCloud email to Thunderbird. If you want to use the tool on a Windows device you may use the alternative link provided above.
- Filters: The tool has a variety of powerful filters that allow you to get the desired result. To move emails selectively, you may specify a date range. Specify start and end dates to transfer emails just from that period. Email fields can also be used to redirect emails sent to certain addresses.
- Safe Tool: It is entirely safe to use the MacUncle software that has been recommended. It gives you the outcomes you want while maintaining the integrity of your emails’ original structure.
Summarize
We offered you a manual as well as an automated way to add iCloud email to Thunderbird. While the manual process is lengthy and requires technical expertise on the user’s part the proposed software is perfect for you. In addition to the email, the software can also import iCloud data to Thunderbird. It is an all-in-one tool that, in addition to the Thunderbird, can also transfer iCloud data on PDF, Office 365, and other saving options. You can download the tool from the link above and start data transfer immediately.
We must mention that when you download the tool; you will initially be presented with the demo version.


